How to Retouch Skin and Face in PicsArt
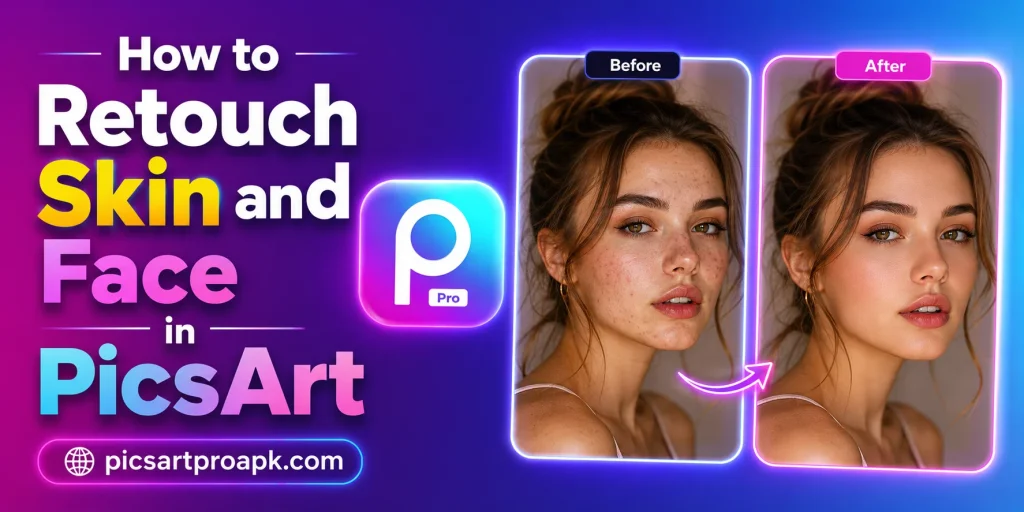
Retouching helps smooth imperfections while keeping a photo looking natural and realistic. This skill is valuable for portraits, social media content, and professional photography. PICSARTPROAPK.COM shares this guide to help you retouch skin and face features in PicsArt.
What Is Skin and Face Retouching
Retouching involves adjusting skin texture, tone, and facial features to improve overall photo quality. This includes smoothing blemishes, reducing shine, and enhancing facial symmetry. PicsArt provides dedicated tools that make this process accessible without professional training.
Why Retouching Is Important
Retouching serves several purposes across personal and professional photography needs. Below are common reasons people use this feature regularly.
- Removing temporary blemishes or skin imperfections
- Reducing shine caused by harsh lighting
- Balancing facial symmetry for portrait photos
- Enhancing overall skin tone and texture
- Preparing photos for professional or business use
Requirements Before You Start
A few basics make the retouching process smoother and more effective.
| Requirement | Details |
|---|---|
| App Version | Latest PicsArt update |
| Photo Quality | Clear, high resolution portrait |
| Device | Android phone with 4GB RAM or higher |
| Internet | Stable connection for tool access |
| Zoom Support | Screen with pinch to zoom feature |
Step by Step Guide to Retouch Skin and Face
Follow these steps for a natural looking retouch result.
Step 1: Open the Portrait Photo
Launch the app and select the photo you want to retouch. Open it inside the main editing screen. Choose a photo with clear facial details for the best results.
Step 2: Access the Retouch Tool
Tap on the Tools option and search for Retouch in the list. This section includes smoothing, blemish removal, and facial adjustment features. Select the specific tool needed for your photo.
Step 3: Smooth Skin Texture
Use the smoothing brush to gently reduce texture and minor imperfections. Apply the effect in moderation to avoid an unnatural plastic looking finish. Zoom in to check details closely as you work.
Step 4: Remove Blemishes
Use the healing or blemish removal tool to target specific spots or marks. Tap directly on the area needing correction for automatic blending. This step works best on small, isolated imperfections.
Step 5: Adjust Facial Features
Use the reshape tool to make subtle adjustments to facial symmetry if desired. Keep changes minimal to maintain a natural and realistic appearance. PICSARTPROAPK.COM recommends using this feature sparingly for the best results.
Step 6: Save and Export
Export the finished photo in high resolution for sharing or printing. Save it to your gallery or share it directly online. Quality export ensures retouching details remain sharp and clear.
Tips for Natural Looking Retouching
These tips help maintain realism while improving photo quality.
- Apply smoothing effects in moderation
- Zoom in regularly to check fine details
- Avoid over editing facial proportions
- Match skin tone adjustments with natural lighting
- Compare before and after using split screen view
Common Mistakes to Avoid
Avoid these common errors during the retouching process.
- Overusing smoothing tools resulting in unnatural skin
- Ignoring lighting consistency across the face
- Making drastic changes to facial features
- Skipping the zoom check for small imperfections
- Forgetting to save the original photo before editing
Best Situations to Use This Feature
Retouching skills apply across many personal and professional photography needs.
For Personal Portraits
Users retouch personal photos before posting on social media or using as profile pictures. This helps present a polished and confident image. Simple adjustments often make a noticeable difference in overall photo quality.
For Professional Photography
Photographers use retouching tools to prepare client photos for business or portfolio use. Clean and professional looking portraits build trust with clients. This step is often standard practice in professional photo delivery.
For Beauty and Fashion Content
Content creators in beauty and fashion niches use retouching to showcase products or looks clearly. This helps highlight makeup application or styling details effectively. Consistent retouching also supports a recognizable content style.
Frequently Asked Questions
Does retouching make photos look fake? Overuse of smoothing tools can create an unnatural look, but moderate application keeps results realistic. PICSARTPROAPK.COM recommends subtle adjustments for the best outcome.
Can I undo retouching changes after saving? Changes become permanent once exported, so keeping the original photo saved separately is always recommended.
Is retouching free to use in PicsArt? Basic retouch tools are available for free users, while some advanced features may require a premium plan.
How much smoothing is too much? If skin texture appears completely flat or unnatural, the smoothing effect has likely been overapplied.
Final Thoughts
Retouching skin and face features in PicsArt helps create polished, professional looking portraits without losing natural realism. With careful and moderate use of these tools, anyone can improve their photos effectively. Visit PICSARTPROAPK.COM to download the app and start retouching your own photos today.