How to Make Stickers in PicsArt: Easy Tutorial
Stickers add fun and personality to photos, chats, and social posts. Making your own stickers gives content a unique touch that stock designs cannot match. PICSARTPROAPK.COM brings you this easy tutorial to create custom stickers using PicsArt.
What Are Stickers in PicsArt
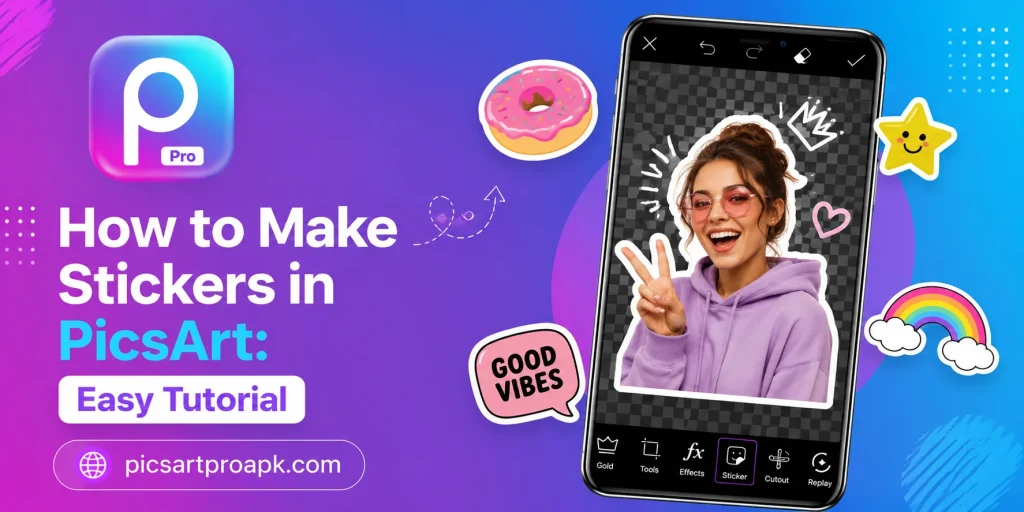
Stickers are cut out images or designs that you can place on top of any photo. They can be a person, object, text, or drawing separated from its background. This app gives users the tools to cut, design, and export stickers in a few taps.
Why Create Your Own Stickers
Custom stickers stand out compared to generic ones found in chat apps. They let you express personal style, brand identity, or specific moments. Below are some common reasons people make their own stickers.
- Personalize chat conversations with unique designs
- Create branded stickers for a business or page
- Make memory based stickers from personal photos
- Design content for social media stories
- Build a sticker pack for friends or followers
Requirements Before You Start
A few basics help the sticker making process go smoothly.
| Requirement | Details |
|---|---|
| App Version | Latest PicsArt update |
| Photo Quality | Clear image with visible edges |
| Device | Android phone with 4GB RAM or higher |
| Internet | Stable connection for tool access |
| Storage | Space to save exported PNG files |
Step by Step Guide to Make Stickers in PicsArt
Follow these steps to create a clean and usable sticker.
Step 1: Open a New Project
Launch the app and tap the plus icon to start a new project. Select the photo you want to turn into a sticker. Choose an image with a clear subject and simple background.
Step 2: Use the Cutout Tool
Go to the Tools section and select Cutout. This feature separates the subject from its background using edge detection. Adjust the selection manually if any part is missed.
Step 3: Refine the Edges
Zoom in and clean up rough edges around the cutout subject. Use the eraser and restore brushes for precise control. Smooth edges make the sticker look more professional.
Step 4: Add Effects or Outline
Apply a border, shadow, or glow effect to make the sticker pop. This step is optional but adds a polished finish. Keep effects simple so the sticker stays clear at small sizes.
Step 5: Export as PNG
Save the sticker with a transparent background using PNG format. This allows it to be placed on any photo or chat without a white box. PICSARTPROAPK.COM users can export in high resolution without extra cost.
Step 6: Use or Share the Sticker
Add the sticker to new projects, chat apps, or social posts. Build a small collection over time for quick reuse. Share your favorite designs with friends or followers.
Tips for Better Sticker Design
These small tips improve the overall quality of your stickers.
- Choose photos with clear and simple subjects
- Zoom in while cutting out small details
- Keep outlines consistent across a sticker set
- Test stickers on different backgrounds before finalizing
- Save a set together for easy access later
Common Mistakes to Avoid
Avoid these errors for a cleaner sticker result.
- Rushing the cutout step and leaving rough edges
- Choosing busy photos with unclear subjects
- Forgetting to export with a transparent background
- Overusing effects that hide the main subject
- Skipping a final zoom check before saving
Best Situations to Use This Feature
Sticker creation fits many everyday and creative needs.
For Personal Chats
Users create stickers from personal photos to use in messaging apps. This adds a fun and personal touch to daily conversations. Friends and family often enjoy these custom designs.
For Business Branding
Small businesses use branded stickers for marketing and customer engagement. A logo or mascot sticker builds recognition on social platforms. This method is low cost compared to professional design services.
For Content Creators
Bloggers and influencers add stickers to stories and reels for extra flair. Unique designs help content stand out in a crowded feed. Sticker packs can also become a shareable asset for followers.
Sticker Tools Comparison
PicsArt offers several tools that support different stages of sticker creation. Understanding what each tool does helps speed up the design process. The table below compares the main options.
| Tool Name | Purpose | Skill Level |
|---|---|---|
| Cutout Tool | Separating subject from background | Beginner |
| Magic Selector | Automatic edge detection | Beginner |
| Manual Brush | Fine tuning cutout edges | Intermediate |
| Effects Panel | Adding borders and shadows | Beginner |
Cutout Tool
The Cutout Tool automatically detects the main subject and removes the background around it. This works quickly for photos with clear subjects and simple backgrounds. It forms the foundation of most sticker creation projects.
Magic Selector
The Magic Selector uses AI to refine edges that the basic cutout tool may miss. This is especially useful for complex shapes like hair or fur. Combining this with manual touch ups produces the cleanest results.
Creating Sticker Packs
Many users move beyond single stickers to build full themed sticker packs. This approach creates a more organized and reusable collection.
Planning a Sticker Set
Decide on a theme before starting, such as expressions, objects, or personal photos. Consistent themes make sticker packs feel more professional and cohesive. Planning ahead also saves time during the actual creation process.
Maintaining Visual Consistency
Keep outline thickness, shadow style, and sizing similar across all stickers in a set. This consistency makes the pack look intentional rather than randomly assembled. PICSARTPROAPK.COM suggests testing the full set together before finalizing exports.
Who Benefits Most From This Feature
Sticker creation serves a wide range of users and purposes.
- Chat app users wanting personalized messaging stickers
- Small business owners creating branded mascot stickers
- Content creators adding stickers to stories and reels
- Event planners designing themed stickers for celebrations
- Hobbyists building fun sticker collections for friends
Advanced Tips for Professional Results
These extra practices help elevate sticker quality further.
- Use consistent lighting across all source photos
- Batch process similar stickers for a unified look
- Test stickers at different zoom levels before finalizing
- Keep a backup folder of all exported sticker files
- Experiment with subtle drop shadows for added depth
Frequently Asked Questions
Can I make stickers from any photo? Yes, but photos with a clear subject and simple background work best. PICSARTPROAPK.COM suggests testing a few images before choosing the final one.
Do stickers need a transparent background? A transparent background is recommended so the sticker fits any surface. PNG format supports this feature during export.
Is sticker making free in PicsArt? The basic cutout and export tools are available for free users. Some premium effects may require an unlock.
Can I use these stickers commercially? Stickers made from your own photos can generally be used freely. Always check licensing rules if using stock or downloaded images.
Final Thoughts
Making stickers in PicsArt is a fun and simple way to add personality to your content. The cutout tool, effects, and export options make the process quick even for beginners. Visit PICSARTPROAPK.COM to download the app and start designing your own stickers today.